
승띵이의 개발일지
[Spring Boot] 댓글 기능 구현 (INSERT to DB) 본문
댓글 기능 구현
이번 포스팅에서는 지난 포스팅 '게시글 확인'에 이어 작성된 게시글에 댓글 기능을 구현해 보려고 한다.
'답글달기'를 클릭하면 해당 댓글에 댓글을 다는 대댓글 기능까지 구현해 볼 것이다.
게시글 확인 : https://myung-it.tistory.com/42
[Spring Boot] 게시글 확인
게시글 확인하기 이번 포스팅에서는 지난 '게시글 작성'에 이어 DB에 INSERT 된 게시글을 확인하는 기능을 구현해 보려고 한다. 게시글 작성 : https://myung-it.tistory.com/41 [Spring Boot] 게시글 작성 (DB INSE
myung-it.tistory.com
그럼...
가보자고요

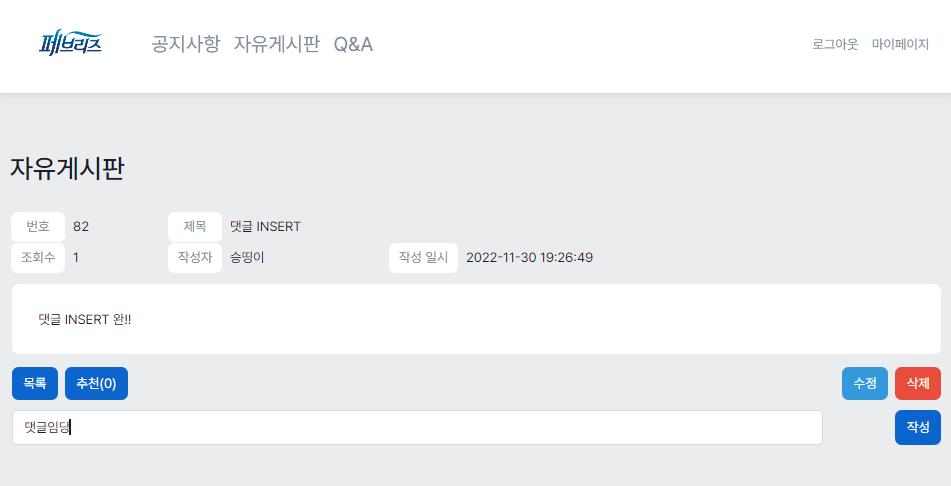
결과

대가리 깨지는 백엔드 작업하러 고고
BbsMapper.xml
<select id="selectArticle" resultType="com.smchoi.studymemberbbs.vos.bbs.ArticleReadVo">
    select `index`       as 'index',
           user_email    as userEmail,
           board_id      as boardId,
           title         as title,
           content       as content,
           `view`        as 'view',
           written_on    as writtenOn,
           modified_on   as modifiedOn,
           user.nickname as userNickname
    from study_bbs.article as article
             left join study_member.users as user on article.user_email = user.email
    where binary `index` = #{index}
    limit 1
</select>

<insert id="insertComment"
        useGeneratedKeys="true"
        keyProperty="index"
        keyColumn="index"
        parameterType="com.smchoi.studymemberbbs.entities.bbs.CommentEntity">
    insert into study_bbs.comments(comment_index, user_email, article_index, content, written_on)
    values (#{commentIndex}, #{userEmail}, #{articleIndex}, #{content},
            ifnull(#{writtenOn}, default(written_on)))
</insert>
댓글 작성을 위해서는 일단 작성한 댓글을 해당 서버의 DB에 INSERT 해주어야 한다.
그러기 위해 이전에 만들었던 ArticleReadVo를 select 해주는 selectArticle과 입력된 댓글 데이터를 comments 테이블에 insert 할 insertComment를 생성하여 활용할 것이다.
IBbsMapper 인터페이스
ArticleReadVo selectArticle(@Param(value = "index") int index);

int insertComment(CommentEntity comment);
BbsService에서 활용할 인터페이스 insertCommet를 생성해준다. 해당 메서드의 파라미터로 CommentEntity comment를 받아준다.
기존에 생성하였던 ArticleReadVo seleteArtice 또한 해당 작업을 수행하는 데 활용할 것이다.
BbsService
public Enum<? extends IResult> writeComment(CommentEntity comment) {
    ArticleEntity article = this.bbsMapper.selectArticle(comment.getArticleIndex());
    if (article == null) {
        return CommonResult.FAILURE;
    }

    return this.bbsMapper.insertComment(comment) > 0
            ? CommonResult.SUCCESS
            : CommonResult.FAILURE;
}
댓글을 해당 서버의 DB에 INSERT한 결과값을 도출하기 위하여 Enum<? extend IResult> 형태의 writeComment 메서드를 생성해준다. 해당 메서드의 파라미터로 CommentEntity comment를 받아주었다.
새로운 ArticleEntity article을 생성해주어 selectArticle(comment.getArticleIndex()) 해 준 값을 할당해 준다.
해당 작업을 통해 article에는 해당 comment의 index 값에 따른 게시글의 정보(ArticleEntity) 값이 저장된다.
만일 article 값이 null 이라면 위 작업에서 어떠한 문제가 발생한 것임으로 FAILURE를 반환해준다.
그렇지 않다면 해당 comment를 insertComment() 해주어 만일 그 값이 0 이상(무조건 1이긴 함) 이라면 SUCCESS를, 그렇지 않다면 insertComment 작업이 어떠한 이유로 인해 완료되지 못한 상황이기에 FAILURE를 반환해 준다.
BbsController
@RequestMapping(value = "read",
        method = RequestMethod.POST,
        produces = MediaType.APPLICATION_JSON_VALUE)
@ResponseBody
public String postRead(@SessionAttribute(value = "user", required = false) UserEntity user,
                       CommentEntity comment) {
    JSONObject responseObject = new JSONObject();
    if (user == null) {
        responseObject.put("result", CommonResult.FAILURE.name().toLowerCase());
    } else {
        comment.setUserEmail(user.getEmail());
        Enum<?> result = this.bbsService.writeComment(comment);
        responseObject.put("result", result.name().toLowerCase());
    }

    return responseObject.toString();
}
Controller에서 String 형태의 postRead() 메서드를 생성하여 매개변수로 @SessionAttribute(value = "user", required = false) UserEntity user, CommentEntity comment를 받아준다.
해당 매개변수의 특성(어노테이션)에 대해서는 이전 게시글에서 충분히 설명하였음으로 굳이 설명하지는 않겠다.
JSONObject responseObject를 생성해주고 만일 user가 null이라면(로그인 되어 있지 않다면) responseObject에 result라는 이름의 키에 FAILURE 값을 할당하여 put 해준다.
그렇지 않다면(로그인 된 상태) comment의 UserEmail 값에 해당 user의 email 값으로 업데이트(set) 작업을 수행해 준다.
Enum<?> result를 생성하여 해당 comment 값으로 writeComment()를 수행하여 결과값을 받아준다.
해당 작업을 수행함으로써 작성한 댓글이 서버의 DB에 insert 되었다.
그런 후 responseObject에 해당 결과값을 put 해주어 JS에서 활용할 수 있도록 조치하였다.
read.js
if (commentForm != null) {
commentForm.onsubmit = e => {
e.preventDefault();
if (commentForm['content'].value === '') {
alert('댓글을 입력해 주세요.');
commentForm['content'].focus();
return false;
}
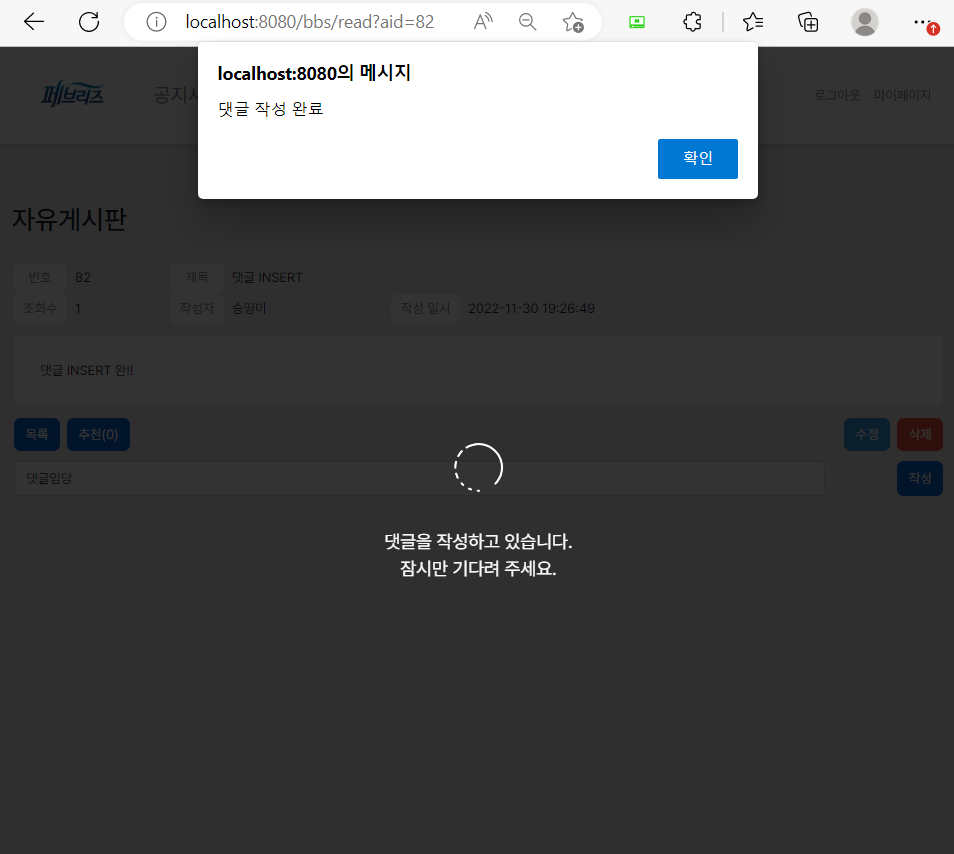
Cover.show('댓글을 작성하고 있습니다.\n잠시만 기다려 주세요.');
const xhr = new XMLHttpRequest();
const formData = new FormData();
formData.append('articleIndex', commentForm['aid'].value);
formData.append('content', commentForm['content'].value);
xhr.open('POST', './read');
xhr.onreadystatechange = () => {
if (xhr.readyState === XMLHttpRequest.DONE) {
if (xhr.status >= 200 && xhr.status < 300) {
Cover.hide();
const responseObject = JSON.parse(xhr.responseText);
switch (responseObject['result']) {
case 'success':
alert('댓글 작성 완료');
loadComments();
break;
default:
alert('알 수 없는 이유로 댓글을 작성하지 못하였습니다.\n\n잠시 후 다시 시도해 주세요.')
}
} else {
alert('서버와 통신하지 못하였습니다.\n\n잠시 후 다시 시도해 주세요.')
}
}
};
xhr.send(formData);
}
}
js를 통해 댓글 작성 후 '작성' 버튼을 클릭 시 위의 작업을 수행하기 위하여 해당 버튼 클릭 이벤트를 생성해주었다.
댓글 작성을 위해서는 로그인 필수적이기 때문에 if 문을 통해 commentForm 존재할 때에만 작업을 수행하도록 조치하였다.
해당 commentForm의 존재 여부는 html에서 th:if 문을 사용하여 지정하였다.
<form class="comment-form" id="commentForm" th:if="${session.user != null}">
//로그인 데이터가 존재할 시에만 해당 폼 생성
commentForm의 submit 버튼이 클릭되었을 때(onsubmit) 만일 해당 폼의 content(댓글 내용)이 공란일 시 '댓글을 입력해주세요.' 라는 alert 팝업 후 content에 focus()를 주도록 지정하였다.
정상적인 댓글이 입력된 후 작성 버튼을 클릭하였다면 cover를 띄운 뒤 xhr 작업이 수행된다.
formData에 게시글 번호인 articleIndex와 댓글 내용인 content를 추가한 뒤 xhr를 open해 준다.
성공적으로 수행이 되었다면 Cover.hide() 해준 뒤 JSON.parse(xhr.responseTex) 값을 가진 상수 responseObject를 생성해 준다.
해당 값은 BbsController에서 지정해준 값인 건 알죠?
switch(responseObject['result])를 생성하여 결과에 따른 도출값을 설정해 준다.
success 시 '댓글 작성 완료' alert 설정 후 loadComments()를 호출하여 모든 작업이 완료된 댓글을 화면에 보일 수 있게 작업하였다.
default 값으료 '알 수 없는 이유로 댓글을 작성하지 못하였습니다.....' alert를 설정해주었다.
만일 작업에 정상적으로 수행되지 않았다면 '서버와 통신하지 못하였습니다......' 라는 alert를 설정해 주었다.
마치며
페이지에 작성된 댓글을 볼 수 있는 것은 본 작업 이후에 추가적인 작업을 해주어야 한다.
해당 부분에 대해서는 추후 포스팅에서 자세히 업로드할 예정임당
본 게시글의 기능은 작성한 댓글을 DB에 INSERT하는 것이라고 봐야 해유
마치며 2
요즘 배우는 것과 이해하는 것과의 갭이 너무 커지는 바람에 한동안 포스팅을 할 수가 없었다.............
개어려움 진짜..
골통 박살나면서 배우는 중입니다

B.U.T
다시 열심히 해볼게요 ㅎㅋㅎㅋ
빠팅
'언어 > Spring Boot' 카테고리의 다른 글
| [Spring Boot] 게시글 확인 (4) | 2022.11.21 |
|---|---|
| [Spring Boot] 게시글 작성 (DB INSERT) (2) | 2022.11.20 |
| [Spring Boot] 게시판 만들기 2 (게시판 별 구분) (0) | 2022.11.16 |
| [Spring Boot] 게시판 만들기 1(feat. CKEditor5) (1) | 2022.11.16 |
| [Spring Boot] 로그인 2 (feat. Cookie, Session ) (0) | 2022.11.15 |


